Transforming Sketch Art into Colorful Masterpieces: A Guide to Stable Diffusion and ControlNet Techniques
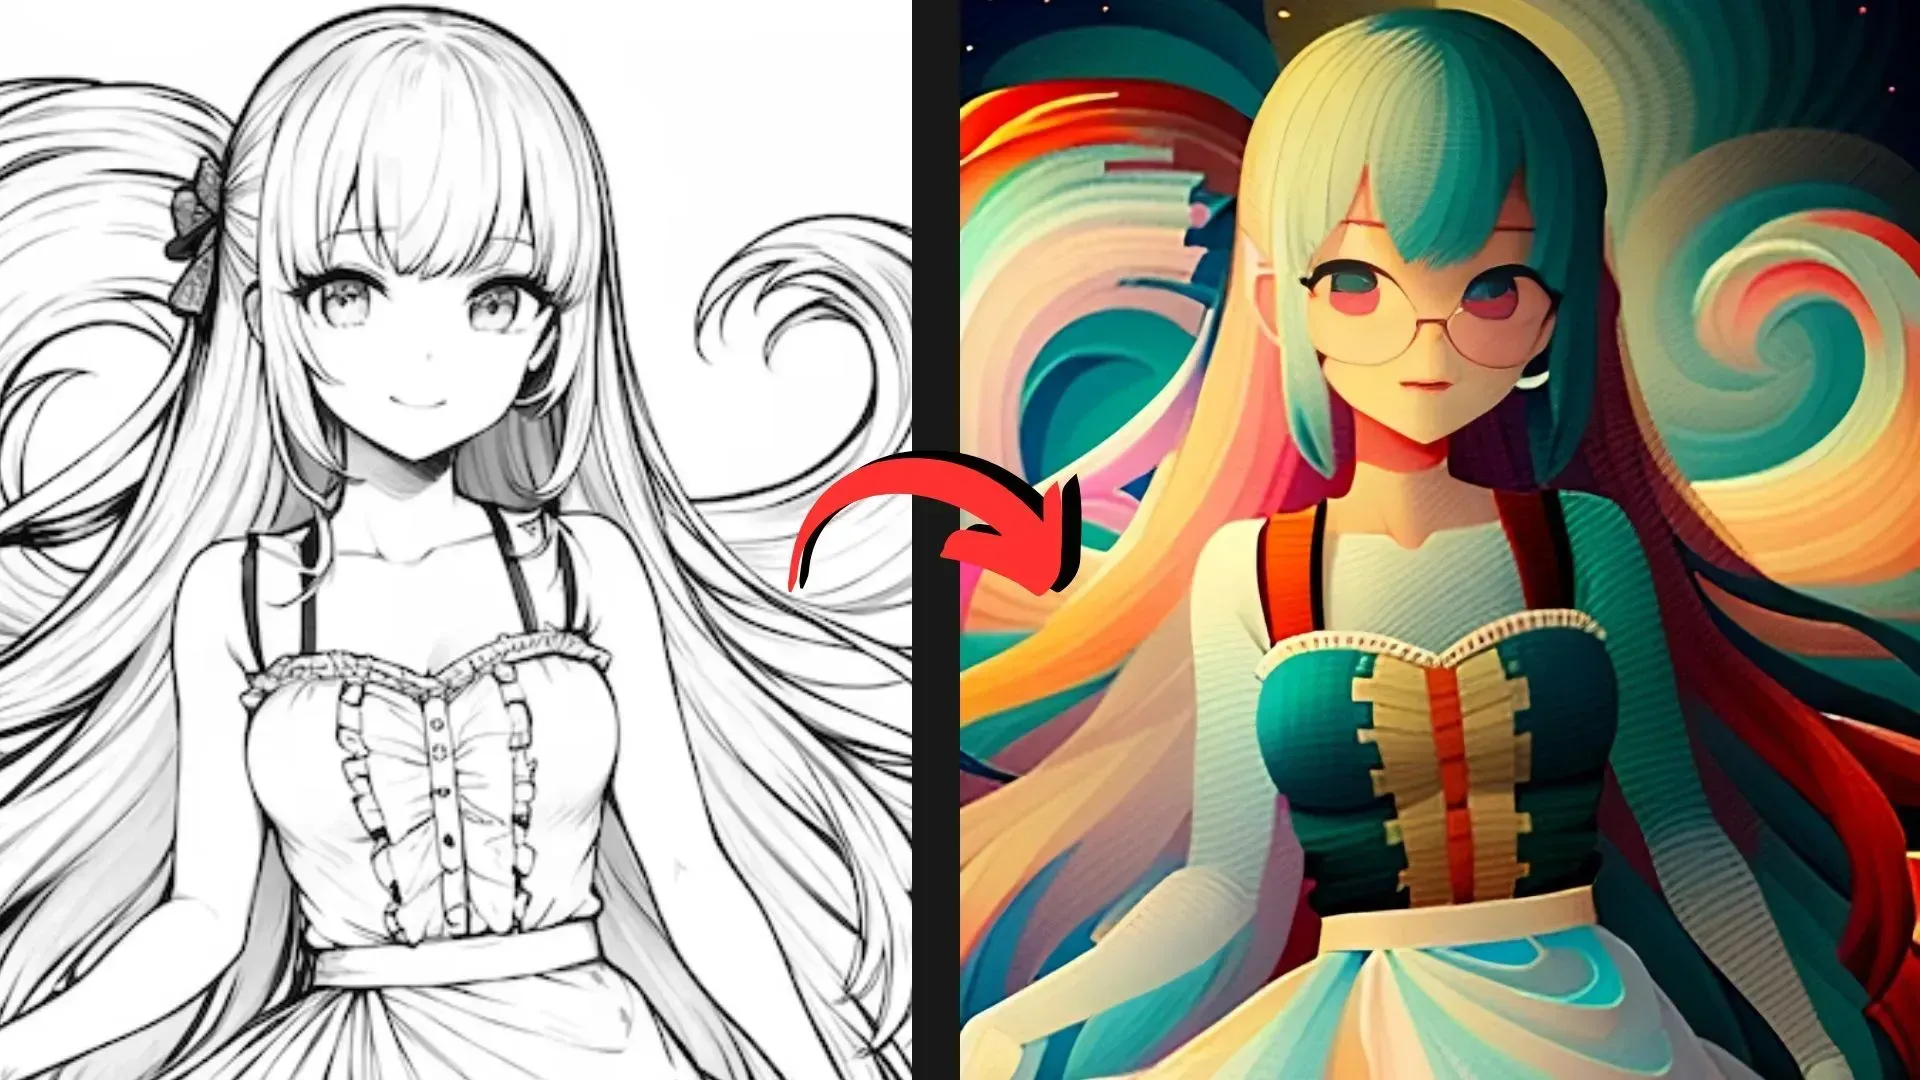
Table of Contents
- 1. Introduction
- 2. Understanding Stable Diffusion and ControlNet
- 3. Setting Up Your Sketch for Colorization
- 4. Choosing the Right Checkpoint and Sampling Approach
- 5. Utilizing ControlNet for Line Art Preservation
- 6. Creating a Color Palette with ControlNet
- 7. Generating Your Colorized Artwork
- 8. Conclusion
1. Introduction
In the realm of digital artistry, the ability to transform simple sketches into stunning masterpieces has become increasingly accessible, thanks to advancements in technology. This blog post focuses on two powerful techniques—Stable Diffusion and ControlNet—that facilitate this transformation. If you have ever wondered how to breathe new life into your line art and bring a splash of color to your creativity, you have landed in the right place. In this detailed guide, we will explore how to effectively utilize these techniques to convert your sketch art into vibrant artworks step by step.
2. Understanding Stable Diffusion and ControlNet
At the core of this artistic revolution are Stable Diffusion and ControlNet, which serve as the backbone of our creative process.
-
Stable Diffusion: This is a deep learning, text-to-image model that utilizes latent diffusion to generate images from text descriptions. It offers flexibility in generating images across various styles and complexities.
-
ControlNet: This technique enhances Stable Diffusion by allowing users to exert greater control over the generation process. It enables the incorporation of specific parameters and constraints that guide the model in producing desired outputs.
By combining these two powerful methods, artists can leverage their skills to generate not just any art, but highly customized and vibrant visuals derived from their original sketches.
3. Setting Up Your Sketch for Colorization
Before you embark on your journey to transform your sketches, it is crucial to properly prepare your artwork. Here are the steps to set up your sketch for colorization:
-
Choose Your Canvas: Ensure that the canvas or sketch you want to colorize is clean and clearly defined. A well-defined line art will yield better results.
-
Aspect Ratio: It's important to consider the width and height proportions that fit the ratio of your line art. In our example, a suitable ratio of 9:16 is chosen to optimize the output.
-
Keep the Seed Value in Mind: Set the seed value to at least -1, which helps in achieving unique outcomes with every generation.
Following these preparatory steps lays a solid foundation for the subsequent colorization process.
4. Choosing the Right Checkpoint and Sampling Approach
Having prepared your sketch, the next step is selecting the appropriate checkpoint and sampling method to ensure high-quality outputs. Here’s how to do it:
-
Checkpoint Selection: Navigate to the text-to-image tab and select a checkpoint that aligns with your artistic goals. For this demonstration, we will use the Rev Animated checkpoint. This choice enhances the animation effects within the art.
-
Sampling Approach: Opt for the DDIM sampling approach and set the number of sampling steps to 30. This increment allows for thorough and detailed rendering of your image, ensuring smoother transitions in colors and shapes.
By making informed choices at this stage, you set yourself up for success in the colorization process.
5. Utilizing ControlNet for Line Art Preservation
As you venture into the ControlNet features, the first step involves ensuring that your original line art is preserved throughout the coloring process. Here’s how to effectively utilize ControlNet:
-
Activate ControlNet: Scroll down to find the ControlNet options, and enable the Pixel Perfect and Allow Preview checkboxes for the first ControlNet unit.
-
Select Control Type: Choose Canny as the control type to maintain the fidelity of your lines in the final image, which is crucial for line art.
-
Set Control Weight: Adjust the control weight to 2. This setting is essential as it emphasizes the visibility of the lines in your colorized output image.
Finally, click the bomb icon to generate a preview of how your lines will appear once colored.
6. Creating a Color Palette with ControlNet
Once you have your line art ready, it’s time to move on to the second ControlNet unit, where you will introduce a color palette. This step is vital, as the palette serves as the foundation for your colorized artwork.
-
Feed the Palette: Provide your canvas with a colorized palette that will inform the coloring process of your sketch.
-
Enable the Settings: Activate the Pixel Perfect and Allow Preview options once again.
-
Select Control Type: For this unit, choose Shuffle. This allows the model to creatively distribute colors across the line art.
-
Maintain Control Weight: Here, keep the control weight at 1 to balance the influence of the palette while still allowing the original art’s features to shine.
After setting this up, click on the bomb icon and observe the captivating color palette being generated, ready to be applied to your line art.
7. Generating Your Colorized Artwork
With all settings adjusted and parameters in place, take a moment to review your work. Once satisfied, it's time for the final step: generating your colorized artwork.
-
Activate the Generate Button: By clicking on the generate button, you will initiate the transformation of your sketch into a colorful display of art.
-
Watch the Magic Unfold: Observe as the layers of color are artfully applied to your sketch, breathing life into your initial drawing. The interplay of color and line creates a striking composition that illustrates the potential of digital artistry.
The process is not just an exercise in technical proficiency; it is also a celebration of creativity and innovation.
8. Conclusion
In this guide, we have undertaken a comprehensive journey through the process of transforming sketch art into vibrant masterpieces using Stable Diffusion and ControlNet techniques. From setting up your sketch to choosing the right checkpoint, maintaining line visibility, and generating stunning colorized outputs, each step is designed to enhance your artistic workflow.
The beauty of this technology lies in its ability to blend creativity with artificial intelligence, enabling both seasoned artists and beginners to explore new avenues of expression. As you engage with these tools, we hope you find joy in the transformative journey of your artistic endeavors.


